Tuesday, October 31, 2017

October 2017 | MONTH IN REVIEW


Here's a quick summary of what we were up to this month.

  • Some of you may know, I flew back to Malaysia via New York & Hong Kong on October 6th, leaving Alex on his own on Raptor to continue working on our never ending list of boat projects. 
  • It took a total of approximately 24 hours of flight time, 8 hours of transit time, 1/2 an hours train ride and an hours car ride to get from Port of Spain, Trinidad to Kuala Lumpur, Malaysia. I finally arrived home on October 8th (after ~34 hours of travel time!)
  • Haven't been posting much as I've been quite busy with family activities and duties. My first order of business when I got home was to send my dear niece to her swimming, music and ballet classes the next morning. I was also tasked to cook dinner on weekdays!
  • On one of the nights, I made them my "famous" chicken rice! Unfortunately the chicken we had was.. well, kinda hairy {yikes}. My mum and I tried our best to pluck as much as we could, but my nephews found a couple of strays and they were horrified! I guess my famous chicken rice is now infamous! ;(
  • I celebrated my birthday again at my favorite all-you-can-eat Japanese Steamboat at Sukiya in Paradigm Mall, had a delicious chocolate cake and also received lots of lovely birthday presents! Thank you family! ♥
  • Time really flies by when you're busy {or having fun}. Much like being on the boat, the days just go by so quickly.. 
  • While I've been busy with family stuff back in Malaysia, Alex has been working hard to make as much progress as he possibly can on Raptor before he joins me next month.
  • He's been pretty good at taking photos of his hard work and sending them to me.
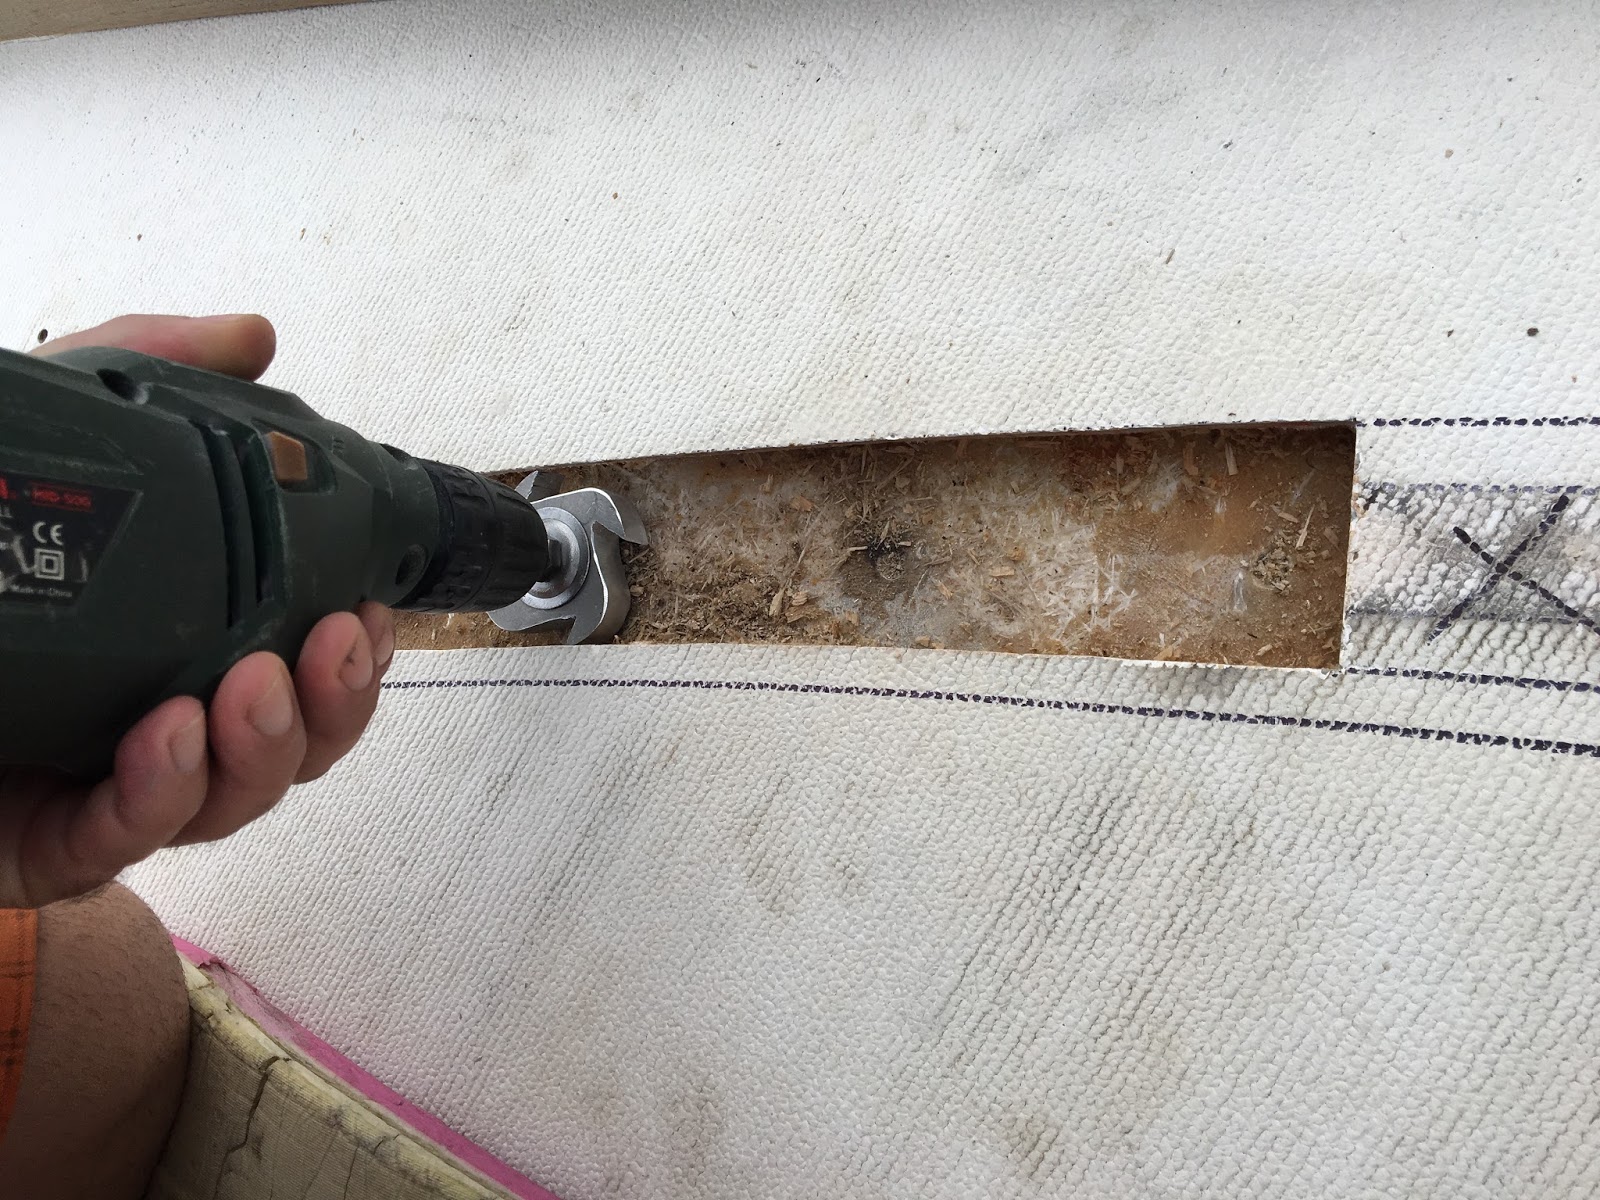
  • He made quite a bit of progress on the Jib Sail Track project despite the rainy weather. Finally filled the cavity with fiberglass and foam, and of course, lots of sanding! See photos below. Stay tuned for a separate post.
  • He also painted the fuel tank. I guess that's about as much as he can do on the Fuel Tank project for now. Till we get the parts i.e. fuel filters (Racor 500FG & 10" stainless steel Shelco), pump (Walbro FRB-22) & variety of connection fittings from the US. 

Check out our posts this month:

Hurricanes 2017

Jib Sail Track Project (Part I)

Jib Sail Track Project (Part II)


September 2017 | MONTH IN REVIEW >>

November 2017 | MONTH IN REVIEW <<


Flight home (Goodbye Trinidad!)
My famous/infamous chicken rice!
Made my favourite burrito bowl for my favourite family
Met up with Daniela's good friend Nicole from Switzerland in Sunway Pyramid
Cut-out pieces of foam to be filled into the deck (part of the Jib Sail Track project)
After many days of layering fiberglass, foam & epoxy and of course lots of unpleasant sanding!
And finally, the painted fuel tank
Lovely photo of the Lighthouse in Chaguaramas (unedited)
Goodbye for now Chaguaramas!

That's all for now.. till next month! :)
Read More »

Wednesday, October 25, 2017

Jib Sail Track Project (Part II)

Welcome to Part II of our Jib Sail Track Project. If you haven't read Part I of this project, click here.

After several weeks of trying to dry out the jib sail track (really hard to do during the wet season), Alex had to fill it with fiberglass and foam. Here's what he did.. (Fair warning: lots of photos)

Measuring the size in order to cut the fiberglass sheets
Once the fiberglass sheets were cut, he applies a layer of epoxy
Then sprinkles loose fiberglass to even out the base
Time consuming work but necessary
Next, he applies the cut out fiberglass sheet
And wets it out fully with epoxy
And the process is repeated
For 2 layers of fiberglass
Looks pretty good actually - the secret is having everything prepared in advance

This was then left to cure completely for a couple of days before sanding.

With a nice, flat reinforced base. Alex had to measure and cut out the foam to fill the cavity. We decided to make it slightly raised from the deck, so that water will not sit under the actual jib track once its back in place.

Look at that
Carefully measured, cut and marked for each of the 4 sections the repair was divided into
Foam pieces for each section
He even made a contraption to allow the foam to be sanded to an even height
The foam epoxied into place
Letting it dry
Filled in the gaps between the sections
Built a little dam around the edges with sikaflex & scrap foam, so that the epoxy will not run onto the rest of the deck when we added 3 more layers of fiberglass to the top
Shit happens when..
Something you can't control ruins your work (Alex was not happy! and neither was this guy)
Sanded and ready to be repainted

There you have it. The jib sail track surface ready for gelcoat.

Check out our post on Spray Painting Our Deck

Read More »

Tuesday, October 3, 2017

Jib Sail Track Project (Part I)

Finally posting our Jib Sail Track Project (Part I)! We first started this project back in August 2017 after we re-bedded all the cleats on deck with backing plates which made them a lot stronger than the small washers we had before. 

Of course, Alex wanted to do the same for the jib sail track (which makes total sense). If you've read our previous posts, you might've seen all the rotted wood we dug out from our deck core while re-bedding the other deck fittings. I knew it's something we had to do.. but did I want to do this too? Hell, no. And did that stop us? Hell, no..

First thing he did before working on it was to build a temporary dam with wood and plastic sheets to keep the water away {it rains every day in Trinidad during the wet season!}.

Here we go..
Removing the screws from the jib sail track
One of many corroded fasteners
The underside of the jib sail track (in the cabin)
Marking up the borders of where to cut through the deck
That's the fuel tank inlet just below the jib track
It's an orange kind of day..
Alex carefully cuts the deck with a hand saw
Gently peeling off the top layer of the deck (at this point we still thought we might re-use the fiberglass ... we didn't!)
The stains look pretty nasty
Alex using a chisel and hammer to remove the balsa core
Close up of the wood
Rotted balsa sections
Some parts were worse than others
Nicely chiselled and wood removed
What's this? A ninja star?
Alex made this to efficiently and evenly remove (about 20mm of) the balsa core - quite clever wouldn't you say?
Fits onto the end of the drill
It worked very well! Watch the video below


Volia!

✓ Removed the jib sail track
✓ Cut out strips on our deck
✓ Dug out the rotted wood


Next, we'd have to dry it out as much as we can (on sunny days) before we fill it with foam and fiberglass, making it slightly raised from the deck before re-bedding the sail track and adding a backing plate as well.

Hop on over to our next post on Jib Sail Track Project (Part II).


Read More »