Friday, March 31, 2017

March 2017 | MONTH IN REVIEW


Here's quick summary of what we were up to this month.

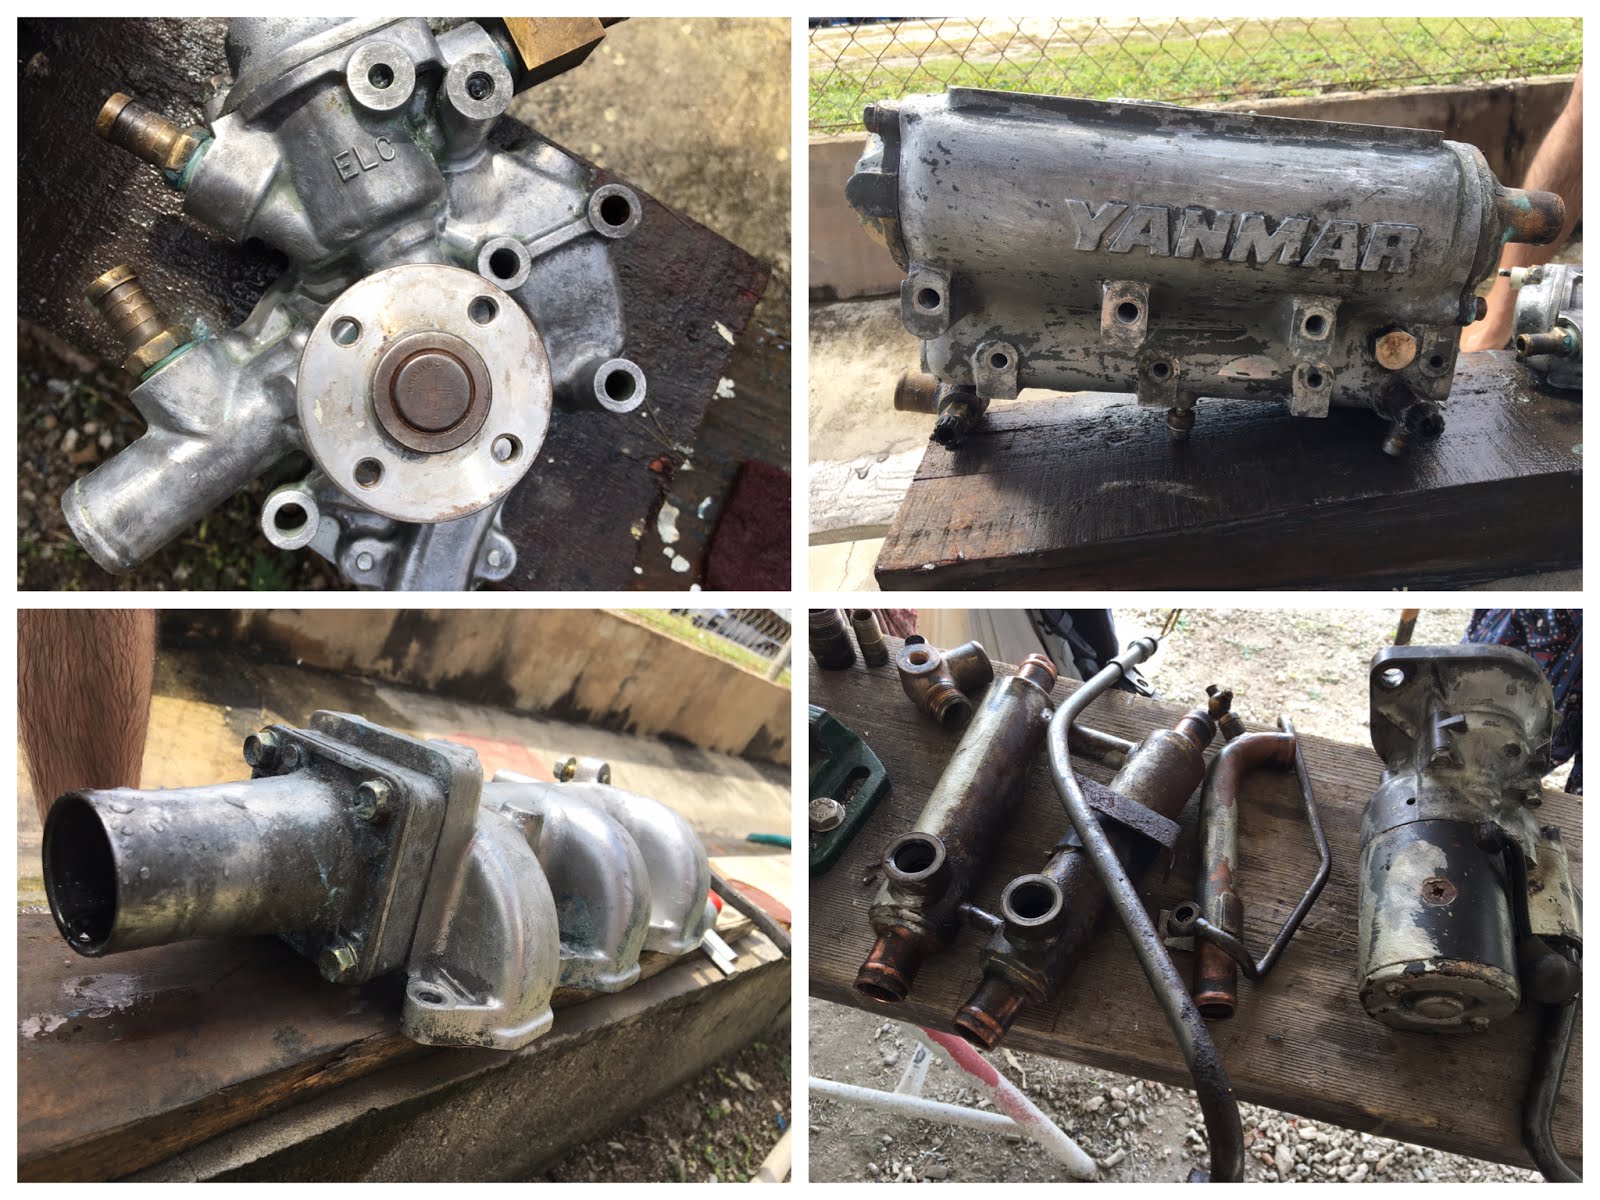
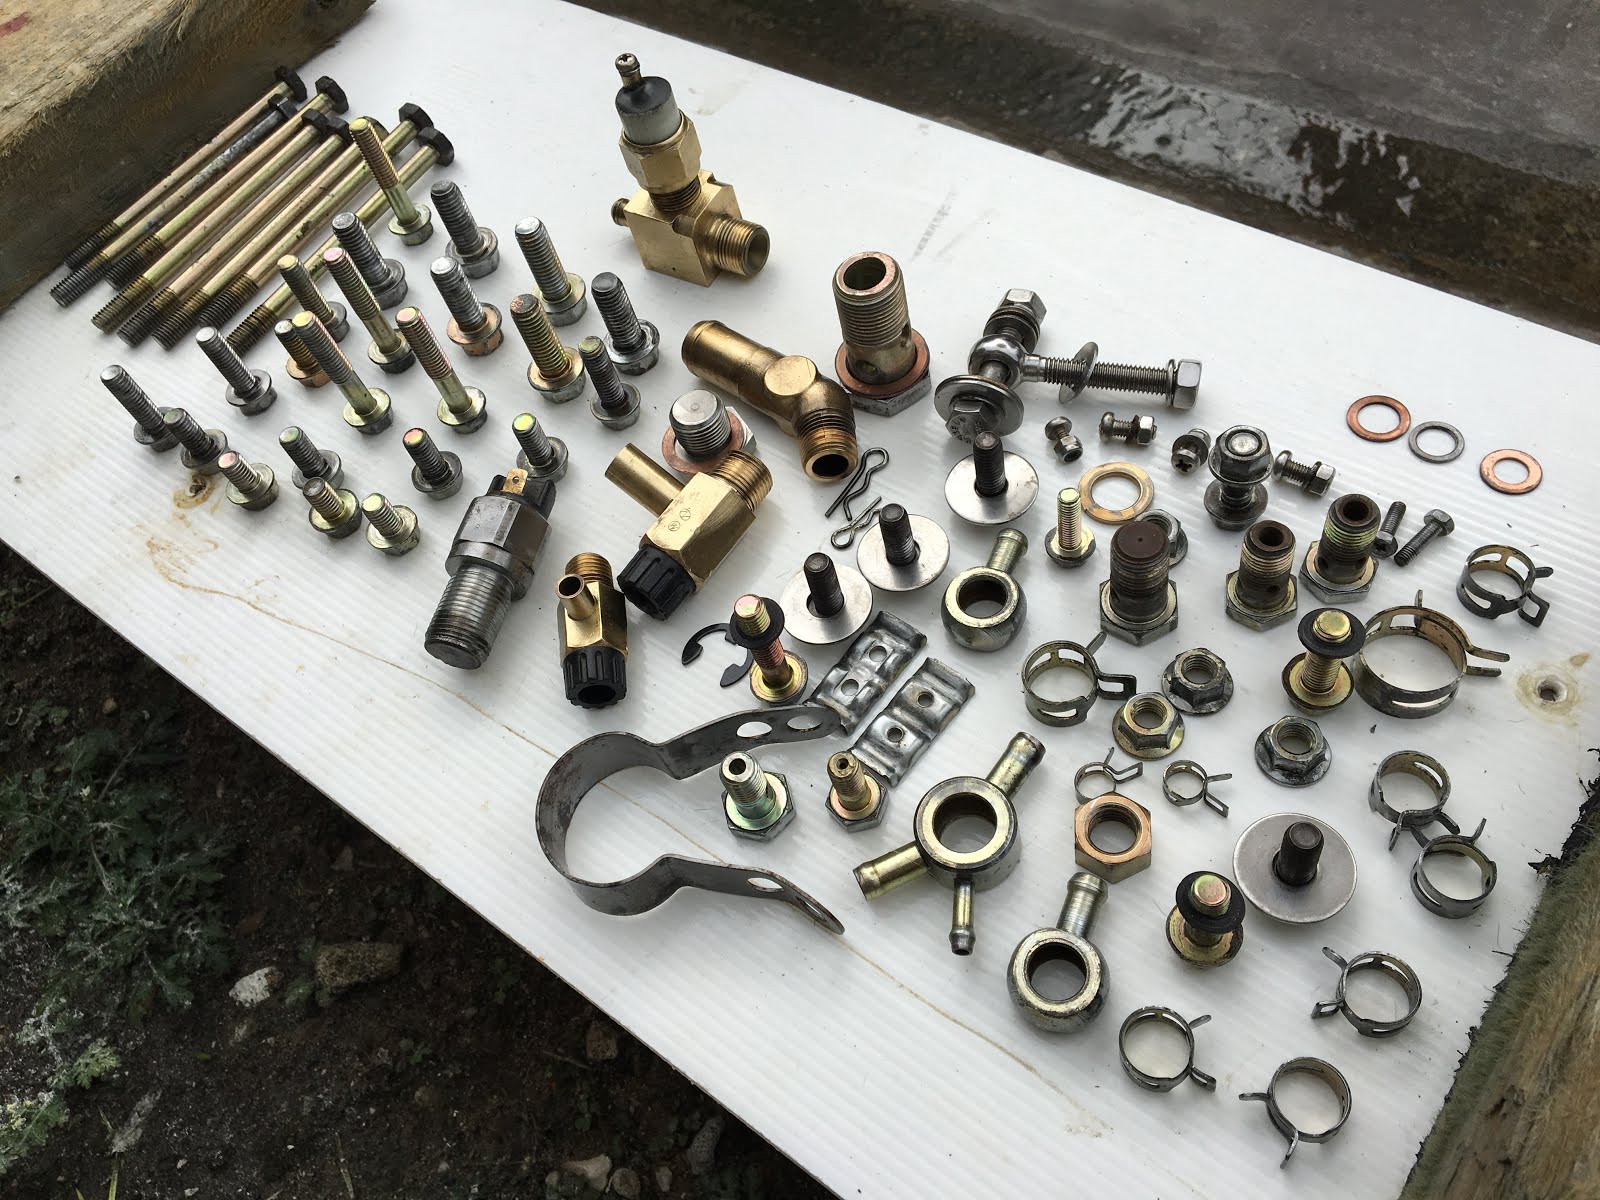
  • As some of you may know, we hauled out our engine last November. We have been working on it sporadically -- disassembling the engine & cleaning each part thoroughly in the last couple of months.  
  • We de-greased, stripped off old paint, sanded and treated the metal in preparation to be painted which we finally completed this month!
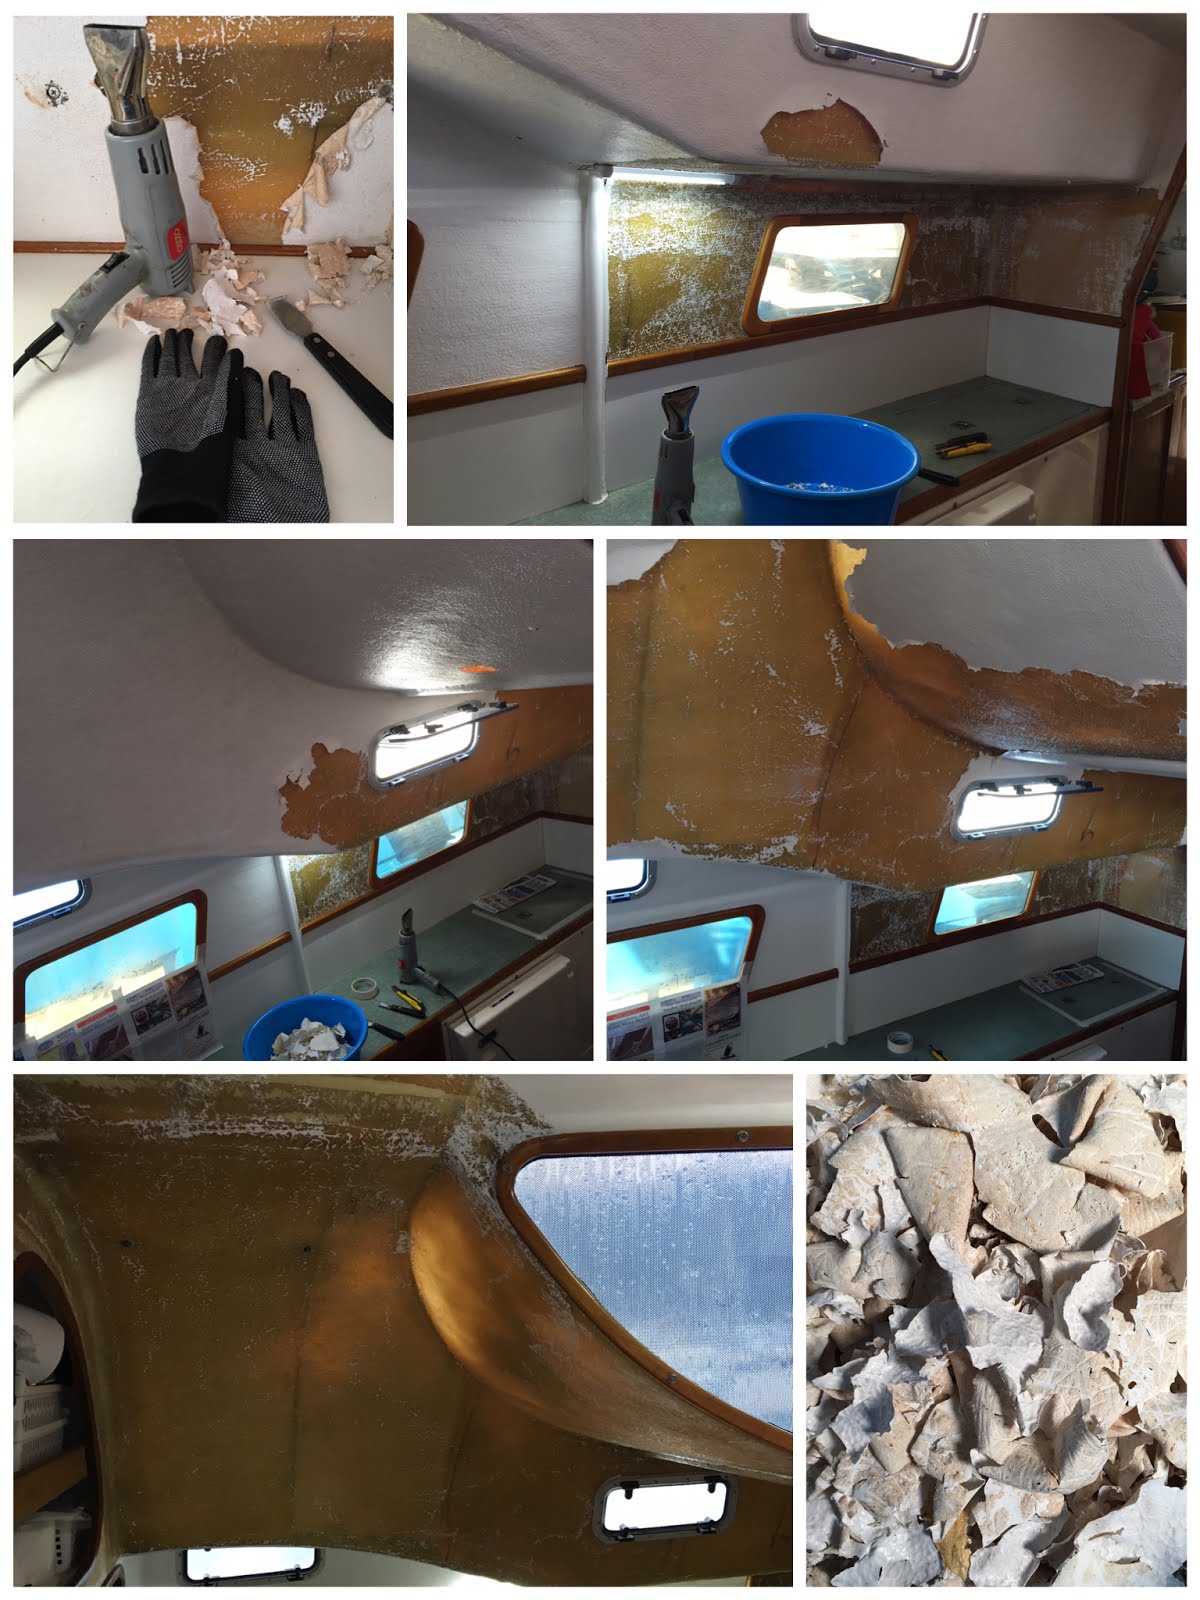
  • With our engine still hauled out, we applied for another visa extension. We are thankful it was approved but the Immigration officer very kindly told us that we better finish our boat projects by the end of this 2nd visa extension as they will not give us a third. Another $100 TTD/person for 3 more months. New visa expiry date: 13th June 2017.
  • I'd like to say that we accomplished a lot since we got back onboard last September even though the list is still long. 6 months worth of work (read 'Boat Works in Trinidad' post). Nothing on a boat is ever easy and straightforward. When you think a job takes 1-2 days, multiple that by 3 or more..
  • We started watching Season 1 of Black Sails, "a pirate adventure that centers on the tales of Captain Flint, who has a reputation throughout the West Indies as being the most brilliant, most feared of all the Golden Age pirates." Argh...
  • We can't wait to sail the Caribbean, but the sailing season ends in June. Will we get our engine back up and running in time?! 

Check out our posts this month:

Hauling Out Our Engine

Boat Works in Trinidad

Spray Painting Our Yanmar Engine

How To Clean A Heat Exchanger

Visa Extension in Trinidad (Updated)


February 2017 | MONTH IN REVIEW >>

April 2017 | MONTH IN REVIEW <<

Read More »

Tuesday, March 28, 2017

How To Clean A Heat Exchanger

Here's a post on how we cleaned the heat exchanger on our Yanmar 50Hp diesel engine without using the ultra high pressure water jetting method.

Method 1 - Soak in Vinegar

We were advised by our dear friends that we could soak it in hot/warm vinegar. Unfortunately we did not have a big enough heat proof container to pour the hot/warm vinegar in. So in the end, we just soaked it in a plastic bottle and left it under the hot sun for a couple of days.

The heat exchanger after soaking it in vinegar
Still grimy in between the tubes
A couple of days later, the heat exchanger was definitely a lot cleaner than it was before, it works! but not quite to Alex's standards.


Method 2 - Soak in Barnacle Buster ®

Alex decided to get a bottle of Barnacle Buster ® from Budget Marine, a safe, non-toxic, biodegradable marine growth remover specifically formulated to clean seawater cooled equipment. Proudly manufactured in Florida, USA. It is said to dissolve barnacles, zebra mussels, calcium, rust, lime and all other mineral deposits. It also boasts that most applications can be completed within 4 hours!

And so.. we took it to the test and soaked half the heat exchanger in the Barnacle Buster (follow instructions for ratio) for about an hour and a half (be careful not to soak it for too long), rinsed it off with water and gently brushed it with a metal brush. We are pleased to say that it worked very well and repeated the process for the 2nd half of the heat exchanger. See photos below.

Before
Rinsing off the chemical with water and brushing it gently with a metal brush
A huge difference between before & after
Here's an After photo.
We still had to run a LOT of water through it to wash out all the deposits inside.
End result - (almost) shiny like new!
Re-assembling the heat exchanger into the Cooling Fresh Water Cooler
The Barnacle Buster $227.08 TTD excl. 12.5% VAT (~ $32.50 USD)
The 2nd method is a lot dearer than the 1st, but it worked quite well and saved us a lot of time.

To be honest I was a little apprehensive at first, I thought this was going to be yet another fancy labelled high priced bottle of waste. Glad I was wrong and apparently we can also use it to clean: -
  • A/C & refrigeration cooling systems
  • Engines seawater cooling systems
  • Bow Thrusters
  • Water Makers
  • Sea Strainers
  • Propellers
  • Seacocks
  • Pumps
  • Piping
  • Hulls
Great! Look forward to making the most of this. Anything that helps reduce the need for elbow grease always gets my vote! :)

Do you know of any other method to clean a heat exchanger? We'd love to hear about it.


Read More »

Wednesday, March 22, 2017

Spray Painting Our Yanmar Engine

As some of you may already know, we hauled out our Yanmar 50Hp diesel engine in November 2016 to be serviced, cleaned and repainted. Oh my! It's a big B-I-G project! 

If you're thinking of doing the same, do check out our other posts related to this project or drop us a comment. We are by no means an expert on this, but now that we've done it, we'd be happy to share our thoughts and experiences if you have any specific questions or if you have some experiences of your own, we'd love to hear it.

Just be aware that it's a tedious and time consuming process (like everything else on a boat). It took us several weeks to get the engine parts ready for painting. 

Engine parts all ready to be spray painted

Check out our setup for Selwyn, the contractor we hired to spray paint the engine parts. We thought it was a smart idea to dangle the parts on the stands. But with only 2 stands, Alex and I had a good workout running back and forth ferrying the parts that day.

Selwyn spray painting and Alex putting on the next item to be spray painted
Once the parts were painted, we'd bring them back and hang them under the boat to dry
The next day, Alex and I decided to change the setup so that we could hang more than two items at a time. 2 A-frames, 2 pieces of long wood and a bunch of nails later...

Our new & improved setup
Voila! Much more efficient and a lot less running. We still had to walk the same amount carrying the parts back & forth, but it was a lot less hectic for us and a lot less waiting time for Selwyn.

"O" so beautiful
The spare fishing lines came in handy
Painted engine parts hanging like Christmas ornaments
Once all the parts were painted, Alex worked on the main engine block and ended up spray painting it himself.

Alex preparing the main engine block to be painted
All done! Not bad for a first timer hey
The time it took for us to complete the painting job? About 10 days (partly delayed due to weather). That excludes the many weeks of prep work i.e. cleaning off the old paint, taping off parts we did not want painted, stuffing screw holes with cloth, tying on fishing lines, etc, etc.

If you're interested to know what we used? Well, we applied 3 coats of Sea Hawk Tuff Stuff Premium Blister Protection High Build Epoxy Primer and 2 coats of OMNI M103 Top Coat Paint.


Sea Hawk Tuff Stuff Set ($2,457 TTD)
OMNI ($152.55 TTD)

Read More »

Monday, March 6, 2017

Boat Works in Trinidad

19th March 2017 is fast approaching and we've still got a long way to go before we're ready to launch. It looks like we will have to make another visa run, our 2nd visa extension application!

A little worried as we've already been here for the last 6 months and we've heard from several cruisers that it's not easy to get a 2nd visa extension. Our appointment at the Port of Spain Immigration office will be at 8am on 14th March. Fingers crossed, let's see how it goes.

In the mean time, the boat works continue. Here's what we have completed thus far..

* Updated 14th March: 2nd visa extension approved for 3 more months! We were told by our kind immigration officer (who was in a good mood), that we will HAVE to complete our jobs in the next 3 months or apply for permanent residence! :)


Jobs Completed:

Installed and aligned rudders
Serviced winches in cockpit
Serviced hydraulic for sail drive leg
Installed AIS Transceiver
Removed rotted wood in saloon
Installed fan in saloon
Installed new batteries for engine and anchor windlass
Modified battery rack and added belt to secure batteries in battery compartment
Replaced corroded wiring in battery compartment
Removed deck fittings and re-sealed holes with epoxy
Made backing plates for deck fittings
Replaced switch for wash down pump
Replaced switch for anchor windlass
Replaced corroded wiring for anchor windlass
Cleaned and serviced anchor windlass motor
Re-painted and fixed broken anchor windlass cover
Removed old paint from the galley, head, port side forward cabin
Re-sealed and re-painted rubbing board on port side
Took apart and cleaned engine (Yanmar)
Took apart and cleaned dive compressor (Bauer)
Cleaned anchor chain
Sanded and re-painted freezer door
Replaced thermostat on water heater
Installed a mosquito netting in the cabin


Jobs In Progress/Not Started:

Replace engine for dive compressor (Bauer)
Re-paint dive compressor
Re-paint and assemble engine (Yanmar)
Install new engine mounts
Replace all clam shells under the boat
Re-bed deck fittings
Install backing plates for the deck fittings (i.e. cleats, winches)
Apply boiled linseed oil on anchor chain
Paint the galley, head, port side forward cabin
Mend crack in starboard side forward cabin
Service outboard engine (Yamaha)

Was planning to give a little more detail to the work completed, but for now, perhaps some photos would suffice.
 
Installed and aligned rudders
Serviced winches in cock pit
Made new fibreglass exhaust tube
Replaced faulty thermostat in water heater
Sanded and re-painted freezer door
Removed deck fittings, dug out rotted core and re-sealed holes with epoxy to prevent future water leakage into our deck core
Removed old paint from Galley
Removed engine for servicing and repainting

Do boat projects ever end?

Boat Works in Trinidad II

Read More »

Friday, March 3, 2017

Hauling Out Our Engine

Ugh.. our Yanmar 50 Hp engine; the bane of our lives. The constant problem throughout our journey for as long as I can remember. 

If it's not the cracked sail drive leg, then it's the disintegrated damper plate, or the rusted mounts or the misaligned alternator belt, even the sail drive leg cover's a problem. It never ends.

I know we have a lot of other issues on-board the boat that cause us to stay at a place for longer than we would like, but the engine (or some part related to it) really takes the cake.

Last November, Alex decided to haul it out to be stripped, cleaned, serviced and repainted.

Hauling out the engine
We sent the engine away to our mechanic here in Trinidad to be disassembled, cleaned and serviced. But as you may already know, things never go as planned or as quickly as we would like. By December, productivity slowed down tremendously as everyone was in a festive mood for the holidays. 

In the end, the engine was partly disassembled by our mechanic and rest was back on us and by "us" I mean it was mostly Alex. In the end it always boils down to the same thing ... if you want to get things done (or done properly), you have to do them yourself.

It took a while before we got the main block engine and its parts back. To be fair, we were waiting on someone else to get back to us on painting the engine, but unfortunately that plan fell through. 

So when we finally got our engine back, we dismantled & cleaned each part so that it could be re-painted (except the fuel injection pump which we sent away to be serviced professionally). That meant de-greasing, stripping off old paint, sanding, treating the metal and prepping the parts to be painted.

 
HS Purple Blaster $63 TTD, Lanco Gel Strip $74.73 TTD, Bonderite C-IC 33 $121.10 TTD, Bonderite M-CR 1201 $157.47 TTD


Here's what we did to clean the engine parts:

1 - First we de-greased the engine parts with the Purple Blaster, a de-greaser (apparently the most powerful on the market; formulated to clean and de-grease tough stains, oil, grease, dirt, etc; perfect for engines!). It worked incredibly well. We just brushed it on to allow it to dissolve the dirt/grease and rinsed it off with water (its seems to do the same thing with your skin though ... dissolve it).

2 - Next, we applied a thick coat of Lanco Gel Strip on the engine parts with a brush. The gel strip is a powerful, non-running type gel stripper formulated to remove coatings from metal, wood, concrete and other surfaces (but not suitable for plastic). The gel is so strong it burns your skin within seconds of contact. We really should've worn gloves for the job. But don't worry, it washes off quickly with water.

3 - The gel is left on for about 20 minutes to allow it to penetrate into the old paint.


4 - When the gel stripper skins over and appears dry, we used a scraper and brush to remove the finish and washed it down with water to remove any remaining gel from the surface.

Photos of the engine parts
5 - For tough spots, we re-applied the gel and repeated the process.

6 - Once the parts were clean and dry, Alex used the drill with metal brushes to remove any residual paint or rust on the surface.

7 - After that, for Aluminum parts, we first treated them with Bonderite Aero Metal Preparation Chemical (C-IC 33) and then with Bonderite Aero Chromate Coating (M-CR 1201) to prep them for paint.  

What's that? The Bonderite C-IC 33 is a non-flammable phosphoric acid based cleaner, brightener and pre-paint conditioner for aluminum which produces a chemically clean and corrosion free aluminum surface. While the Bonderite M-CR 1201 is a non-flammable chromic acid based liquid used for corrosion protection and paint adhesion to aluminum surfaces.

8 - For Steel parts (which aren't painted), we coated them with Boeshield T-9 an anti-rust & corrosion spray that dries to a clean, waxy, waterproof film;  safe to use on paints, any metal surfaces, plastic, fiberglass and vinyl. It was developed by the Boeing Company for lubrication and protection of aircraft components but it's also said to be particularly effective in protecting all metals in salt water environments ... the jury is still out as to whether it actually works, but our money is on 'not so much'. (In general, most products we use tend to over-promise & truly under-deliver)

9 - This process was repeated for all the engine parts, including all washers, nuts and bolts. 

Some of the many nuts and bolts - cleaned
10 - Oh and we also coated all the washers, nuts and bolts with Boiled Linseed Oil.

Cleaned parts
The process to clean & prep all the parts took weeks to complete. It was also crucial to time the paint job as the metal tends to rust up again if it's left for too long (more than a day or so). We had a couple of delays due to weather and had to re-clean some of the parts again (with metal brushes to remove the rust). "Fun" times! :)


Next: Spray Painting Our Engine

Other related posts:

How To Clean A Heat Exchanger

Installing New Engine Mounts

Strip, Service & Repaint Our Yanmar Diesel Engine

Read More »